Pages

Thursday, December 19, 2013

December Craft Fair

I did a craft fair earlier in the month and wanted to share some pictures.
I loved how the display was set up.  The wood piece in the background is a cabinet door that I found at resale shop.  My husband then put the baskets from a shelving store on to hold my cards.  He also attached legs to the back that are anchored with a chain.  It worked out very well.
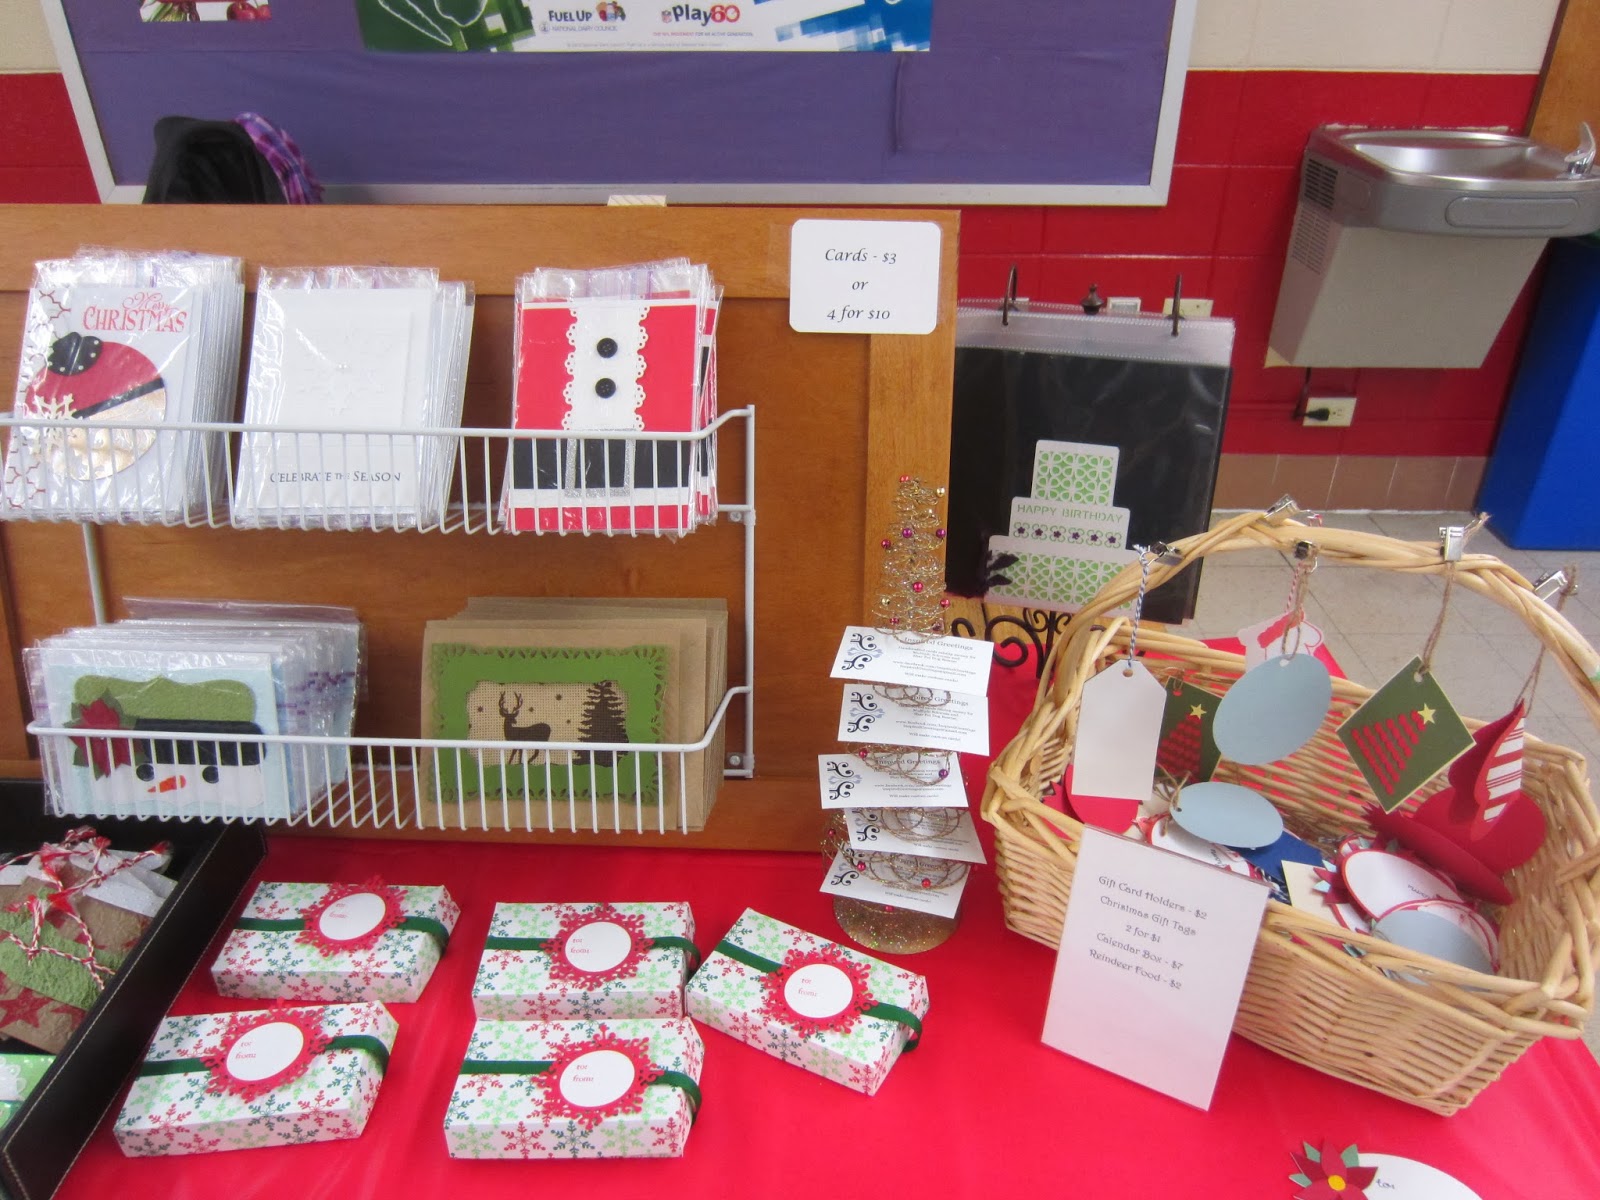
 I had clear plastic picture holders for my prices.  The basket is holding some Christmas gift tags that I was also selling.  I might have to revisit how to display these better or maybe sell them in packages
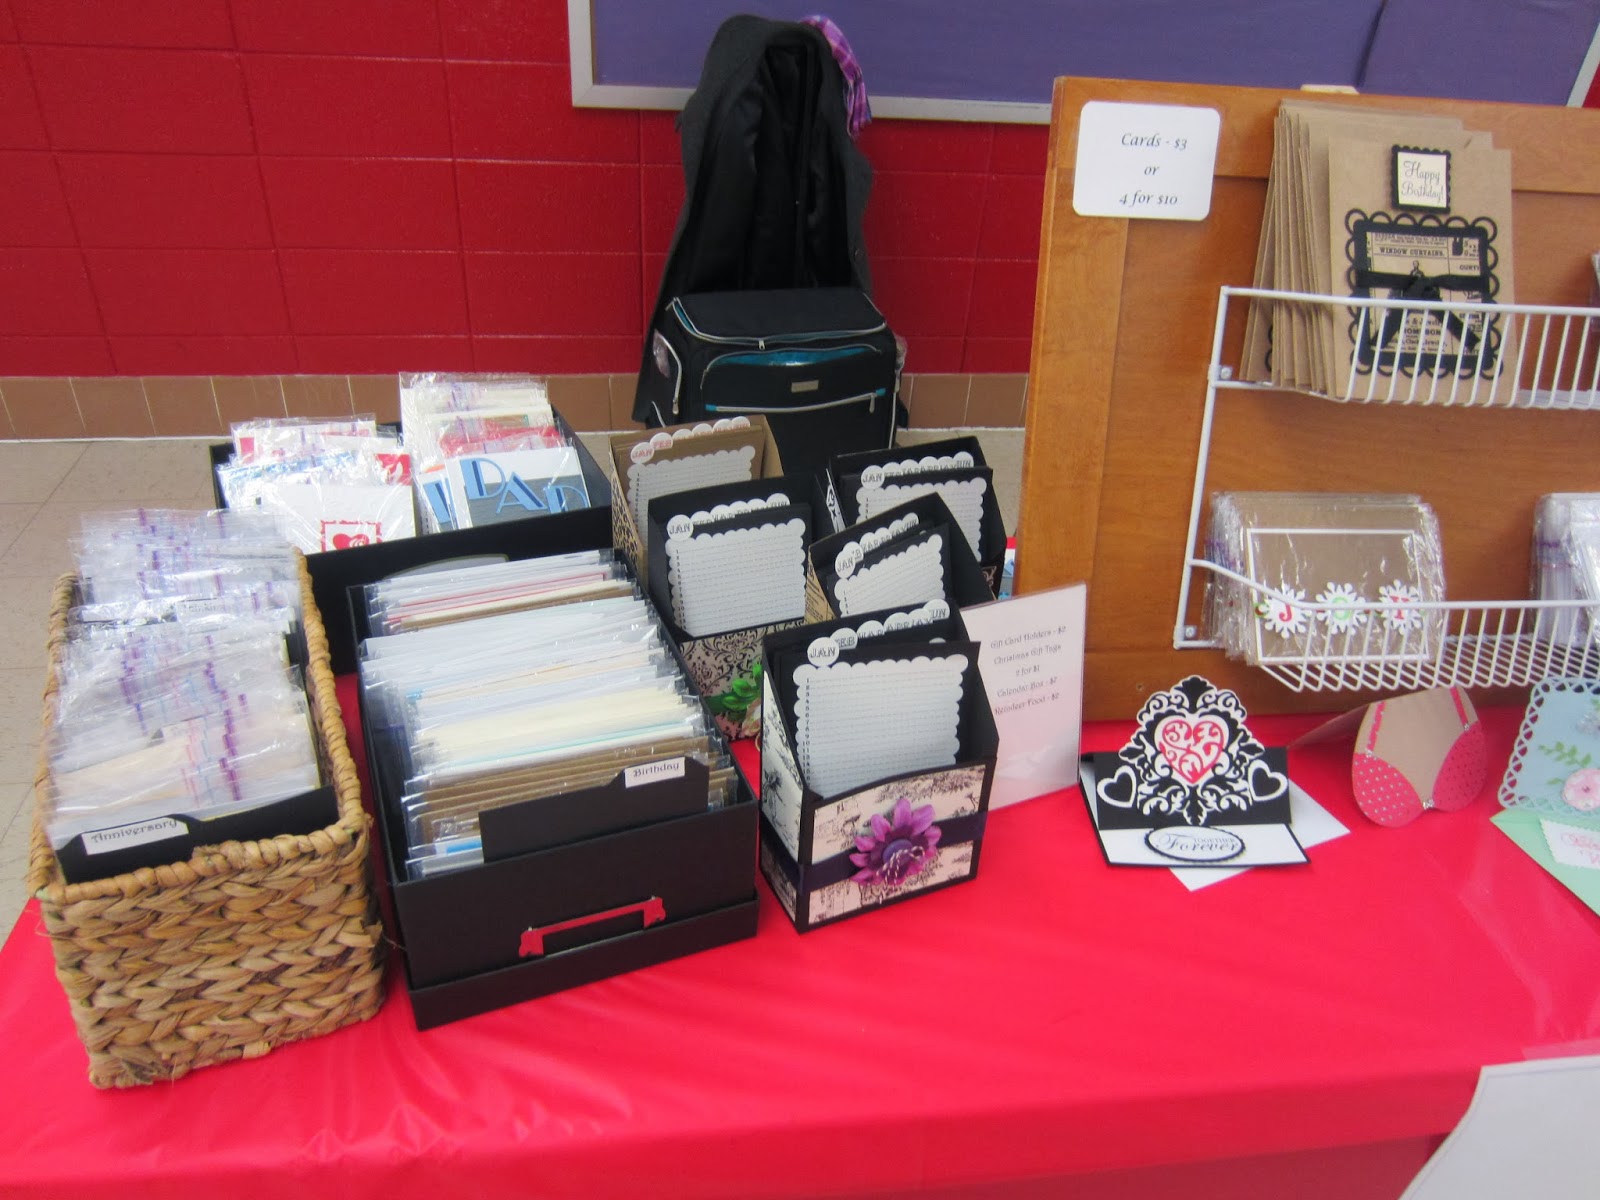
In the basket and in the picture box on this side I had cards for all occasions.  The decorated smaller boxes I created are calendar card reminders.  I got a lot of good comments on them but no buyers.

I think I did pretty goo for my first craft fair.  I made 3x my both fee which is good since my prices of thins sold was only $3 to $1.  I hope to try to incorporate more height in my next show to try to draw more people in.

Friday, December 6, 2013

White on White Christmas

It's starting to get closer to Christmas!  This white on white card is one of my favorites. I feel that the best way to do a white on white card is lots of layers.  All embossed lines were created using the Martha Stewart score board.  There is a layer that is embossed with 'Perfect Dots' by Stampin Up.  The snowflake was cut from Cricut Christmas cartridge..

Friday, November 22, 2013

Christmas Pop-Up gift card box

 I was looking for new way to give a gift card and saw this box.  You can find the tutorial here.  I really like the idea of being able to add a some candy along with gift card.  The snowflake tag was cut out using Spellbinders Ironwork Motifs.  The ribbon that raps the box keeps it closed.
I haven't decided if I want to stamp a message on the inside but there is always that possibility,

Tuesday, November 12, 2013

Tree Gift Tag

A quick Christmas Tag this week.
This was a free cut in Cricut Craft Room the week of 11/4.  I could easily be replicated using Accent Essentials or any other cartridge that has a basic circle and star pattern.  There are 4 layers if you count the star.  The yellow star is 3/8" wide.  The green is 2 1/2"-x-3 1/2".  I used a red that was cut at 2 3/8"-x-3 3/8".  The backing is an ivory card stock that is cut at 2 5/8"-x-3 5/8".  This framed the front nicely and then on the back I stamped To: & From:.  I used a rustic twine for the tie string.

Monday, November 4, 2013

Snowman Card

With Halloween over it's time to start on some of those Winter Cards.  I just love this snowman card.  I made it last year for the first time and had lots of orders for more.  The base is lite blue that is embossed with a snowflake pattern.  The snowman fave and top of the hat were cut using Stampin' Up, Top Note Die.  The brim of the hat is black card-stock with rounded edges.  The eyes are 1/2" circles cut using the cricut.  The carrot is from cut from the Cricut with the leaves snipped off.  The poinsettia is a cut file from Sihloutte.

Monday, October 21, 2013

Double Tri-fold Cascade Castle

A custom card for a little girl.  This is my first attempt to a double cascade card.  I found the directions on Pinterest.  The castle roof tops are a of pink card stock that were embossed with a brick pattern   To give it definition, I highlighted the mortar with a cotton swab dabbed with some dark grey Momento ink.  The 'Happy Birthday were from some stickers that I had that are on a doily frame cut in half.  The little girl loved the card.  It was fun to make but also more challenging since of the all the detail possibilities.

Friday, October 18, 2013

Motorcycle

This motorcycle card I made for a co-worker.  He's not into Harley's so I wanted to stay away from orange & black.  The card base is red.  The silver paper had a little sheen to it and then I embossed it with a diamond embossing folder.  The motorcycle is a free clip-art image that I found.  The 'How old are you?' is a clear stamp I have from a birthday set from Michaels.  The guy loved the card and I hope you do to.

Tuesday, October 15, 2013

Sunflower Birthday

What a great fall birthday card!!  
This card was done as gate fold card.  I used kraft paper colored card stock.  I used the We R Memory Keepers Envelope Punch Board to create the file folder tabs that cover the center gab.  The Sunflower was cut from Cricut  Art Nouveau.  I truly love this cartridge!  The bottom leaf and the greeting label interlock to keep the card closed.

Wednesday, October 9, 2013

Halloween

Halloween is on it's way.  I choose to make a Double Fold Gate card.  I haven't made any cards like this before and I thought it would be fun to try.  Most Double Fold Gate cards that I have seen were decorated where the folds came together.  For this card I choose to decorate the larger flat panel (back of card) and make the card be able to be displayed like an easel card.  The witch and the tree were cut from Cricut Teresa Collins, Chic & Scary and the fence was from A Frightful Affair.  The fence is popped out from the card to add dimension.  This card was a lot of fun to make and I hope you like it.

Saturday, October 5, 2013

World Card Making Day!

Today is World Card Making Day!
  I'm trying to make as many cards as possible today.  (I will try to post pictures later.)  I currently busy getting ready fro my first craft fair.  I'm nervous and excited at the same time.  The Fair is October 12th in a small town near by.  It is hard to know what and how much to make.  I am hoping that the turn out will be good.  I also hope that since I give all my proceeds to charity that it might encourage people to at least look at my cards and of course buy some.

I hope everyone else is enjoying the day and getting some crafting time in.  If you are, let us know what you made today.

Tuesday, September 10, 2013

Birthday Card Keeper

I decided that with all the cards that I have been making that I need to keep them organized.  I saw this idea on Pinterest and loved it.   The directions can be found here.  I choose to have each tab to represent each month with all the days listed. I finished it with coordinating decorative paper that was cut .5" shorted the the panel.  I then added the ribbon and the flower for a punch of color.  I hope you like.


Thursday, September 5, 2013

September Card Class

In July I held my first card class.  It went pretty good.  I've decided to do hold them on a regular schedule.  They are going to be on the odd month on the second Saturday.  Fun right!
I am trying to have a theme for each of these events.  For the September class I asked my last group what they would like to see.  I got the request for some wedding cards.  The first one made with Cricut Damask.
Wedding card #2.  The Newlywed towels card.  I really love all the embossing textures.


 I figured that not everyone has 4 weddings to go to so I added some sympathy cards.  Yes, weddings and funerals can go together.  This is another card playing with embossing textures.  I thought about adding a ribbon but didn't want to take away from the embossing.  The white paper is pearlized to help enhance the textures.
This is my take of a fall sympathy card.  I really like how it turned out.  I'm usually not much of a stamper but this was fun to just stamp anywhere.

Monday, August 26, 2013

Firetruck card

What little boy doesn't love firetrucks?  This is a card that I purchased from the Sihloutte online store.  It was made with scraps that I had.  The windows are scraps that have aluminum foil added to them.

Birthday Golf

This is a quick card that I made for a class.  I have so many co-workers that are golfers that it's always a good card to have on hand.

Thursday, August 1, 2013

Gallery of Cards

Gallery of Cards

Baby Cards


Kids Birthday Cards

Female Birthday Cards

Male Birthday Cards

Sympathy Cards

Care / Concern Cards

Blank Cards

Wedding Cards

Easter Cards
Mother's Day Cards


Christmas Cards

Monday, July 15, 2013

Birthday Butterflies

This birthday card I demonstrated to few people that I had over to my house.  Everyone really seemed to like this card.  The label was done with a print & cut on the Sihloutte.  The teal background was embossed with Sampin-Up Texturz plates.  The pearlized white was embossed with a Sizzex folder.  The butterflies were cut from the Cricut.

Tuesday, July 9, 2013

50th Anniversary

This a card that I am currently working on for my in-laws 50th Anniversary.  It was cut using my Silhoutte Cameo.  The file I'm using was from a Facebook group that I belong to called Silhoutte cameo cuts and digi design.  I used pearlized white paper for 4 of the five layers.  I also used a metallic gold for the "50th" and for the upper gold layer.  The lower gold layer is actually is cut from the peralized white the rubbed gold ink over it to give a different shade of gold.  I plan on writing a a message on the right if I can not find a picture of them from the wedding.

Tuesday, July 2, 2013

Diamond Plate Birthday

This is a great masculine birthday card.  The grey card stock was embossed with the diamond plate pattern and then rubbed a black ink pad over it to accent the pattern.  The same technique was used for the black paper but with a light grey ink as the accent.
The silver shiny part is aluminum foil.  I crumbled it then re-flattened it to give the wrinkled look.

Tulip Card

This card I made for a female birthday.  I think the pink and green shades compliment each other very well.  The Tulips were cut utilizing Cricut Art Nouveau.  The patterned paper and ribbon is something that I had gotten from Michael's in the past.